安装 lnmp 环境

使用lnmp.org的lnmp安装一键包,按程序安装好即可,并顺手创建一个虚拟主机,不需要重写,不需要数据库。
本文采用 lvcshu.com 为示例域名
安装 HEXO
按照官网说明的方法一步步安装
安装 node.js
curl:
1
|
curl -o- https://raw.githubusercontent.com/creationix/nvm/v0.33.2/install.sh | bash
|
或
wget:
1
|
wget -qO- https://raw.githubusercontent.com/creationix/nvm/v0.33.2/install.sh | bash
|
然后重启终端或者ssh重新连接
1
|
nvm install stable
|
安装 hexo-cil
1
|
npm install -g hexo-cli
|
随后就会很快安装完成!
部署博客
安装Hexo后,运行以下命令以初始化目标中的Hexo 。
此处的 folder 就是我们博客的主目录,即 lnmp 虚拟主机的目录,进入目录以后执行
1 2 3 |
hexo init . npm install hexo g |
此时我们博客的静态页面已经成功生成了,但是访问页面是没有办法看到的,接着下一步
调整 nginx 配置文件
打开 nginx 相应站点 的配置文件,找到
1
|
root /home/wwwroot/lvcshu.com;
|
改为
1
|
root /home/wwwroot/blog.lvcshu.com/public;
|
记住:有两个地方要改,对应http与https
推荐:可以将 http 通过301跳转,跳转到 https
1
|
lnmp nginx restart
|
看看效果吧!
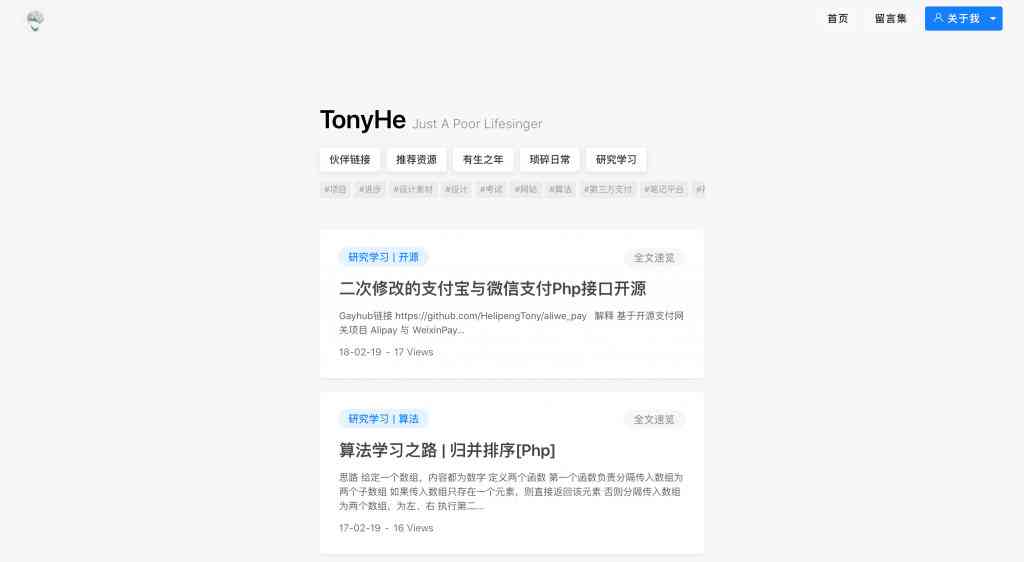
更换主题
网络上有很多开源的,十分漂亮的 hexo 主题而默认主题是真的丑我想不使用默认主题,找到了一个极简但是十分美观的主题——“NexT”
安装 NexT 主题
进入博客主目录
1
|
git clone https://github.com/theme-next/hexo-theme-next themes/next
|
然后前往 站点配置文件(博客主目录下 ‘_config.yml’) 将 theme 字段改为 next ,然后执行 hexo clean && hexo g ,打开网站即可看到效果。
Next主题优化
以下内容来自 Hexo+Next主题优化 建议前往围观及点赞!
设置主题风格
打开 themes/next/_config.yml 文件,搜索 scheme 关键字,将你需用启用的 scheme 前面注释 # 去除即可。
1 2 3 4 5 6 7 8 9 |
# --------------------------------------------------------------- # Scheme Settings # --------------------------------------------------------------- # Schemes #scheme: Muse # 默认 Scheme,这是 NexT 最初的版本,黑白主调,大量留白 #scheme: Mist # Muse 的紧凑版本,整洁有序的单栏外观 scheme: Pisces # 双栏 Scheme,小家碧玉似的清新 #scheme: Gemini # 类似 Pisces |
设置菜单项的显示文本和图标
NexT 使用的是 Font Awesome 提供的图标, Font Awesome 提供了 600+ 的图标,可以满足绝大的多数的场景,同时无须担心在 Retina 屏幕下图标模糊的问题。
设置菜单项的显示中文文本:
打开 themes/next/languages/zh-Hans.yml 文件,搜索 menu 关键字,修改对应中文或者新增。
1 2 3 4 5 6 7 8 9 10 11 12 |
menu: home: 首页 archives: 归档 categories: 分类 tags: 标签 about: 关于 search: 搜索 schedule: 日程表 sitemap: 站点地图 commonweal: 公益404 # 新增menu catalogue: 目录 |
设定菜单项的文件目录和对应图标(新版两项合并)
打开 themes/next/_config.yml 文件,搜索 menu_icons 关键字,修改对应图标名称或者新增对应 menu 的图标。
1 2 3 4 5 6 7 8 9 10 11 12 13 14 15 16 17 18 19 20 21 22 23 24 25 26 27 |
# --------------------------------------------------------------- # Menu Settings # --------------------------------------------------------------- # When running the site in a subdirectory (e.g. domain.tld/blog), remove the leading slash from link value (/archives -> archives). # Usage: `Key: /link/ || icon` # Key is the name of menu item. If translate for this menu will find in languages - this translate will be loaded; if not - Key name will be used. Key is case-senstive. # Value before `||` delimeter is the target link. # Value after `||` delimeter is the name of FontAwesome icon. If icon (with or without delimeter) is not specified, question icon will be loaded. menu: home: / || home archives: /archives/ || history categories: /categories/ || list tags: /tags/ || tags tools: /categories/工具资源/ || briefcase about: /about/ || user #schedule: /schedule/ || calendar #sitemap: /sitemap.xml || sitemap #commonweal: /404/ || heartbeat # Enable/Disable menu icons. # Icon Mapping: # Map a menu item to a specific FontAwesome icon name. # Key is the name of menu item and value is the name of FontAwesome icon. Key is case-senstive. # When an question mask icon presenting up means that the item has no mapping icon. menu_icons: enable: true |
除了 home, archives , /后面都需要手动创建这个页面
创建菜单项对应文件目录
以分类为例,在终端窗口下,定位到 Hexo 站点目录下。使用 hexo new page 新建一个页面,命名为 categories :
1 2 |
$ cd your-hexo-site $ hexo new page categories |
编辑刚新建的页面,设置分类
1 2 3 4 5 6 |
--- title: 分类 date: 2014-12-22 12:39:04 categories: Testing #分类名 type: "categories" --- |
头像设置
添加头像
打开 themes/next/_config.yml 文件,搜索 Sidebar Avatar 关键字,去掉 avatar 前面的 #:
1 2 3 4 |
# Sidebar Avatar # in theme directory(source/images): /images/avatar.jpg # in site directory(source/uploads): /uploads/avatar.jpg avatar: http://example.com/avatar.png |
或者使用本地图片,把图片放入 themes/next/source/images 下,修改 avatar:
avatar: /images/avatar.gif
设置头像边框为圆形框
打开位于 themes/next/source/css/_common/components/sidebar/sidebar-author.syl 文件,修改如下:
1 2 3 4 5 6 7 8 9 10 11 12 |
.site-author-image { display: block; margin: 0 auto; padding: $site-author-image-padding; max-width: $site-author-image-width; height: $site-author-image-height; border: $site-author-image-border-width solid $site-author-image-border-color; // 修改头像边框 border-radius: 50%; -webkit-border-radius: 50%; -moz-border-radius: 50%; } |
特效:鼠标放置头像上旋转
1 2 3 4 5 6 7 8 9 10 11 12 13 14 15 16 17 18 19 20 21 |
.site-author-image { display: block; margin: 0 auto; padding: $site-author-image-padding; max-width: $site-author-image-width; height: $site-author-image-height; border: $site-author-image-border-width solid $site-author-image-border-color; // 修改头像边框 border-radius: 50%; -webkit-border-radius: 50%; -moz-border-radius: 50%; // 设置旋转 transition: 1.4s all; } // 可旋转的圆形头像,`hover`动作 .site-author-image:hover { -webkit-transform: rotate(360deg); -moz-transform: rotate(360deg); -ms-transform: rotate(360deg); -transform: rotate(360deg); } |
浏览页面的时候显示当前浏览进度
打开 themes/next/_config.yml ,搜索关键字 scrollpercent ,把 false 改为 true。
把top按钮放在侧边栏
如果想把 top 按钮放在侧边栏,打开 themes/next/_config.yml ,搜索关键字 b2t ,把 false 改为 true。
1 2 3 4 5 |
# Back to top in sidebar b2t: true # Scroll percent label in b2t button scrollpercent: true |
侧边栏设置
设置侧边栏社交链接
打开 themes/next/_config.yml 文件,搜索关键字 social ,然后添加社交站点名称与地址即可。
1 2 3 4 5 6 7 8 9 10 11 12 13 14 15 |
# --------------------------------------------------------------- # Sidebar Settings # --------------------------------------------------------------- # Social Links. # Usage: `Key: permalink || icon` # Key is the link label showing to end users. # Value before `||` delimeter is the target permalink. # Value after `||` delimeter is the name of FontAwesome icon. If icon (with or without delimeter) is not specified, globe icon will be loaded. social: E-Mail: mailto:yourname@gmail.com || envelope Google: https://plus.google.com/yourname || google Twitter: https://twitter.com/yourname || twitter FB Page: https://www.facebook.com/yourname || facebook # 等等 |
设置侧边栏社交图标
打开 themes/next/_config.yml 文件,搜索关键字 social_icons ,添加社交站点名称(注意大小写)图标,Font Awesome图标地。
RSS
在你 Hexo 站点目录下:
1
|
npm install hexo-generator-feed --save
|
打开 Hexo 站点下的 _config.yml ,添加如下配置:
1 2 3 4 5 6 7 8 |
# feed # Dependencies: https://github.com/hexojs/hexo-generator-feed feed: type: atom path: atom.xml limit: 20 hub: content: |
友情链接
打开 themes/next/_config.yml 文件,搜索关键字 Blog rolls:
1 2 3 4 5 6 7 |
# Blog rolls links_title: 友情链接 #标题 links_layout: block #布局,一行一个连接 #links_layout: inline links: #连接 baidu: http://example.com/ google: http://example.com/ |
主页文章添加边框阴影效果
打开 themes/next/source/css/_custom/custom.styl ,向里面加代码:
1 2 3 4 5 6 7 8 |
// 主页文章添加阴影效果 .post { margin-top: 0px; margin-bottom: 60px; padding: 25px; -webkit-box-shadow: 0 0 5px rgba(202, 203, 203, .5); -moz-box-shadow: 0 0 5px rgba(202, 203, 204, .5); } |
修改文章间分割线
打开 themes/next/source/css/_common/components/post/post-eof.styl ,修改:
1 2 3 4 5 6 7 8 9 10 |
.posts-expand { .post-eof { display: block; // margin: $post-eof-margin-top auto $post-eof-margin-bottom; width: 0%; //分割线长度 height: 0px; // 分割线高度 background: $grey-light; text-align: center; } } |
代码块自定义样式
1 2 3 4 5 6 7 8 9 10 11 12 13 14 15 |
// Custom styles. code { color: #ff7600; background: #fbf7f8; margin: 2px; } // 边框的自定义样式 .highlight, pre { margin: 5px 0; padding: 5px; border-radius: 3px; } .highlight, code, pre { border: 1px solid #d6d6d6; } |
开启版权声明
主题配置文件下,搜索关键字 post_copyright , enable 改为 true:
1 2 3 4 5 |
# Declare license on posts post_copyright: enable: true license: CC BY-NC-SA 4.0 license_url: https://creativecommons.org/licenses/by-nc-sa/4.0/ |
- 自定义文章底部版权声明
效果:1 2 3 4
作者:Dragonstyle 链接:http://www.dragonstyle.win/2017/09/06/Android-Studio个人设置/ 來源:简书 版权声明: 本博客所有文章除特别声明外,均采用 CC BY-NC-SA 4.0 许可协议。转载请注明出处!
在目录 themes/next/layout/_macro/ 下添加 my-copyright.swig ,内容如下:
1 2 3 4 5 6 7 8 9 10 11 12 13 14 15 16 17 18 19 20 21 22 23 24 25 26 27 28 29 30 31 32 33 |
{% if page.copyright %} <div class="my_post_copyright"> <script src="//cdn.bootcss.com/clipboard.js/1.5.10/clipboard.min.js"></script> <!-- JS库 sweetalert 可修改路径 --> <script type="text/javascript" src="http://jslibs.wuxubj.cn/sweetalert_mini/jquery-1.7.1.min.js"></script> <script src="http://jslibs.wuxubj.cn/sweetalert_mini/sweetalert.min.js"></script> <link rel="stylesheet" type="text/css" href="http://jslibs.wuxubj.cn/sweetalert_mini/sweetalert.mini.css"> <p><span>本文标题:</span>{{ page.title }}</a></p> <p><span>文章作者:</span>{{ theme.author }}</a></p> <p><span>发布时间:</span>{{ page.date.format("YYYY年MM月DD日 - HH:mm:ss") }}</p> <p><span>最后更新:</span>{{ page.updated.format("YYYY年MM月DD日 - HH:mm:ss") }}</p> <p><span>原始链接:</span><a href="{{ url_for(page.path) }}" title="{{ page.title }}">{{ page.permalink }}</a> <span class="copy-path" title="点击复制文章链接"><i class="fa fa-clipboard" data-clipboard-text="{{ page.permalink }}" aria-label="复制成功!"></i></span> </p> <p><span>许可协议:</span><i class="fa fa-creative-commons"></i> <a rel="license" href="https://creativecommons.org/licenses/by-nc-nd/4.0/" target="_blank" title="Attribution-NonCommercial-NoDerivatives 4.0 International (CC BY-NC-ND 4.0)">署名-非商业性使用-禁止演绎 4.0 国际</a> 转载请保留原文链接及作者。</p> </div> <script> var clipboard = new Clipboard('.fa-clipboard'); clipboard.on('success', $(function(){ $(".fa-clipboard").click(function(){ swal({ title: "", text: '复制成功', html: false, timer: 500, showConfirmButton: false }); }); })); </script> {% endif %} |
在目录 themes/next/source/css/_common/components/post/ 下添加 my-post-copyright.styl,内容如下:
1 2 3 4 5 6 7 8 9 10 11 12 13 14 15 16 17 18 19 20 21 22 23 24 25 26 27 28 29 30 31 32 33 34 35 36 37 38 39 40 41 42 43 44 45 |
.my_post_copyright { width: 85%; max-width: 45em; margin: 2.8em auto 0; padding: 0.5em 1.0em; border: 1px solid #d3d3d3; font-size: 0.93rem; line-height: 1.6em; word-break: break-all; background: rgba(255,255,255,0.4); } .my_post_copyright p{margin:0;} .my_post_copyright span { display: inline-block; width: 5.2em; color: #333333; // title color font-weight: bold; } .my_post_copyright .raw { margin-left: 1em; width: 5em; } .my_post_copyright a { color: #808080; border-bottom:0; } .my_post_copyright a:hover { color: #0593d3; // link color text-decoration: underline; } .my_post_copyright:hover .fa-clipboard { color: #000; } .my_post_copyright .post-url:hover { font-weight: normal; } .my_post_copyright .copy-path { margin-left: 1em; width: 1em; +mobile(){display:none;} } .my_post_copyright .copy-path:hover { color: #808080; cursor: pointer; } |
修改 themes/next/layout/_macro/post.swig ,在代码如下:
1 2 3 4 5 |
{% if theme.wechat_subscriber.enabled and not is_index %} <div> {% include 'wechat-subscriber.swig' %} </div> {% endif %} |
之前添加增加如下代码:
1 2 3 4 5 |
<div> {% if not is_index %} {% include 'my-copyright.swig' %} {% endif %} </div> |
修改 themes/next/source/css/_common/components/post/post.styl 文件,在最后一行增加代码:
1
|
@import "my-post-copyright"
|
设置新建文章自动开启 copyright,即新建文章自动显示自定义的版权声明,设置 your site/scaffolds/post.md文件
1 2 3 4 5 6 7 8 |
--- title: {{ title }} date: {{ date }} tags: type: "categories" categories: copyright: true #新增,开启 --- |
修改文章底部的那个带#号的标签
打开 themes/next/layout/_macro/post.swig 文件,搜索 rel="tag"># ,将 # 换成 <i class="fa fa-tag"></i>
1 2 3 4 5 |
<div class="post-tags"> {% for tag in post.tags %} <a href="{{ url_for(tag.path) }}" rel="tag"><i class="fa fa-tag"></i> {{ tag.name }}</a> {% endfor %} </div> |
本地搜索
在你站点的根目录下
1
|
npm install hexo-generator-searchdb --save
|
打开 Hexo 站点的 _config.yml,添加配置
1 2 3 4 5 |
search: path: search.xml field: post format: html limit: 10000 |
打开 themes/next/_config.yml ,搜索关键字 local_search ,设置为 true:
1 2 3 4 5 6 7 8 9 |
# Local search # Dependencies: https://github.com/flashlab/hexo-generator-search local_search: enable: true # if auto, trigger search by changing input # if manual, trigger search by pressing enter key or search button trigger: auto # show top n results per article, show all results by setting to -1 top_n_per_article: 1 |